一,Bus消息总线的概述
Spring Cloud Bus主要是配合Spring Cloud Config使用,通过Bus可以使用Config的完全自动动态刷新
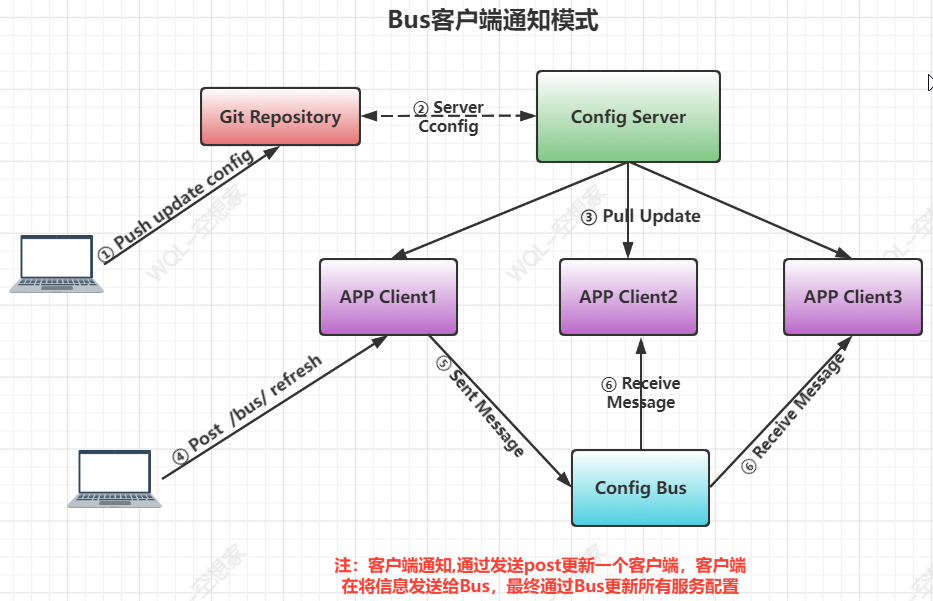
服务总线的概念:在微服务架构的系统中,通常会使用轻量级的消息代理来构建一个共有的消息主题,并让系统中的所有微服务实例都连接上来,由于该主题中产生的消息会被所有实例监控消费,在总线上的各个实例,都可以方便地广播一些需要让其他连接在该主题上的实例都知道消息
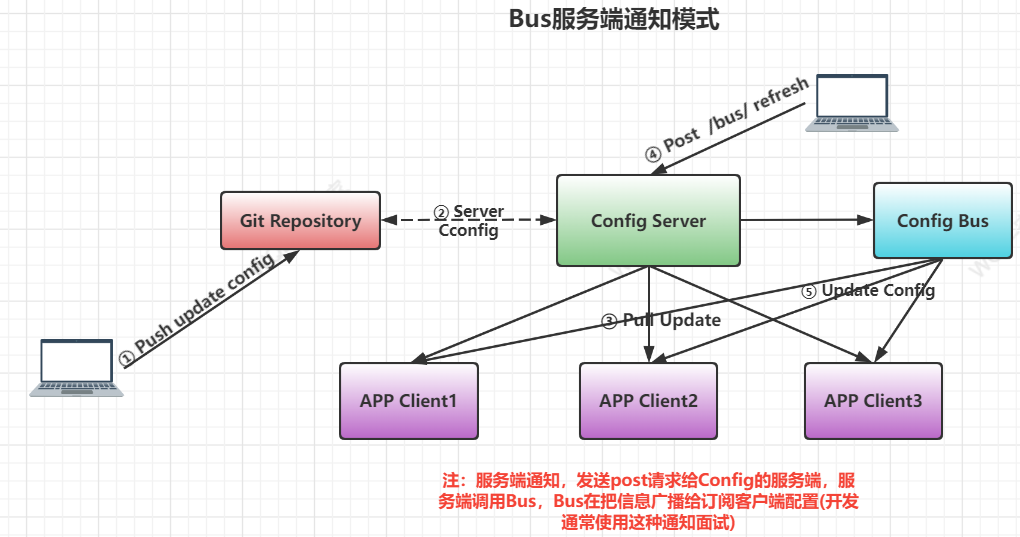
Bus总线的基本原理:ConfigClient实例都监听MQ中同一个topic(默认名称是springCloudBus),当一个服务刷新数据的时候,会把这个信息放入Topic中,这样其他监听同一个Topic的服务就能得到通知,然后更新Config配置
Bus总线的作用:管理和传播分布式系统间的消息,就像一个分布式执行器,可用于广播状态更改,事件推送,也可以当作微服务间的通信通道
Bus总线默认支持和使用信息中间件有两种:
- RabbitMQ
- KafKa
Bus消费总线有两种通知模式:
1,客户端通知
2,服务端通知
二,Bus消息总线的使用
一般开发中采用服务通知模式,这里演示的是服务端使用BUS总线
准备:
- 一个配置Config服务端
- 两个Config客户端
一,服务端配置
① maven依赖
<dependency>
    <groupId>org.springframework.cloud</groupId>
    <artifactId>spring-cloud-config-server</artifactId>
</dependency>

<dependency>
    <groupId>org.springframework.boot</groupId>
    <artifactId>spring-boot-starter-web</artifactId>
</dependency>

<dependency>
    <groupId>org.springframework.boot</groupId>
    <artifactId>spring-boot-starter-actuator</artifactId>
</dependency>

<dependency>
    <groupId>org.springframework.boot</groupId>
    <artifactId>spring-boot-devtools</artifactId>
</dependency>

<dependency>
    <groupId>org.springframework.cloud</groupId>
    <artifactId>spring-cloud-starter-netflix-eureka-client</artifactId>
</dependency>

<dependency>
    <groupId>org.springframework.cloud</groupId>
    <artifactId>spring-cloud-starter-bus-amqp</artifactId>
</dependency>
② application配置
server:
  port: 9098
spring:
  application:
    name: cloud-config-center
  cloud:
    config:
      server:
        git:
          uri: https://github.com/WQL-KXJ/SpringCloudConfig.git #GitHub上的仓库名字
          search-paths:
            - SpringCloudConfig #搜索的目录
      label: master #读取的分支
  rabbitmq:
    username: admin
    password: 123
    host: 192.168.68.133
    port: 5672

eureka:
  client:
    fetch-registry: true
    service-url:
      defaultZone: http://eureka1.com:9090/eureka/,http://eureka2.com:9091/eureka/
management:
  endpoints:
    web:
      exposure:
        include: "*"
③ main启动类
@SpringBootApplication
@EnableConfigServer//开启Config Server
public class ConfigMain {
    public static void main(String[] args) {
        SpringApplication.run(ConfigMain.class,args);
    }
}
启动这个Config后,RabbitMQ中自动新建一个名为springCloudBus的Exchange:
二,客户端配置
两个客户端配置是一样的,改一下端口号和服务名称即可
① maven依赖
<dependency>
    <groupId>org.springframework.cloud</groupId>
    <artifactId>spring-cloud-starter-config</artifactId>
</dependency>

<dependency>
    <groupId>org.springframework.boot</groupId>
    <artifactId>spring-boot-starter-web</artifactId>
</dependency>

<dependency>
    <groupId>org.springframework.boot</groupId>
    <artifactId>spring-boot-starter-actuator</artifactId>
</dependency>

<dependency>
    <groupId>org.springframework.boot</groupId>
    <artifactId>spring-boot-devtools</artifactId>
</dependency>

<dependency>
    <groupId>org.springframework.cloud</groupId>
    <artifactId>spring-cloud-starter-netflix-eureka-client</artifactId>
</dependency>

<dependency>
    <groupId>org.springframework.cloud</groupId>
    <artifactId>spring-cloud-starter-bus-amqp</artifactId>
</dependency>
② bootstrap配置
server:
  port: 8089
spring:
  application:
    name: cloud-config-client
  cloud:
    config:
      label: master #分支名称
      name: cloudconfig #配置文件名称
      profile: dev #后者名称,就是-后面的名称
      uri: http://localhost:9098 #加起来就是http://localhost:9098/master/cloudconfig-dev.yml
  rabbitmq:
    username: admin
    password: 123
    host: 192.168.68.133
    port: 5672
eureka:
  client:
    fetch-registry: true
    service-url:
      defaultZone: http://eureka1.com:9090/eureka/,http://eureka2.com:9091/eureka/
management:
  endpoints:
    web:
      exposure:
        include: "*"
③ main启动类
@SpringBootApplication
@EnableEurekaClient
public class ConfigClientMain2 {
    public static void main(String[] args) {
        SpringApplication.run(ConfigClientMain2.class,args);
    }
}
④ Controller类
@RestController
@RefreshScope
public class ConfigController {
    @Value("${wql}")
    String wlq;

    @Value("${config.info}")
    String info;

    @GetMapping("/getapplication")
    public String get(){

        return "{wql:"+wlq+",info:"+info+"}";
    }
}
#localhost:9098为config服务端的ip和地址,路径是固定的
curl -X POST http://localhost:9098/actuator/bus-refresh
三,Bus消息总线的定点刷新
Bus定点刷新非常简单,不需要更改然后配置,只需要在POST请求上进行即可
格式:http://IP:Port/actuator/bus-refresh/服务名:端口名
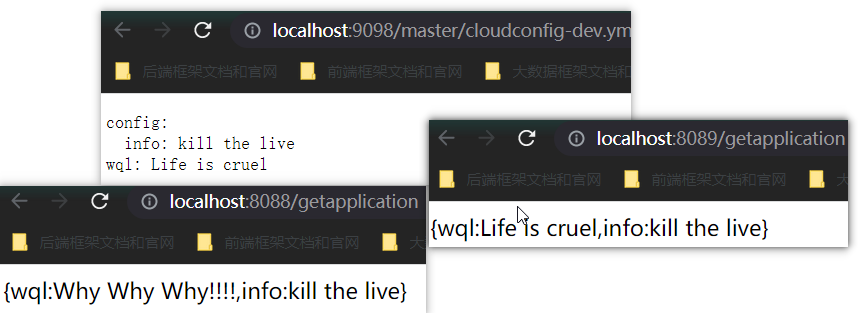
比如现在定点刷新8089,不刷新8088:
curl -X POST http://localhost:9098/actuator/bus-refresh/cloud-config-client2:8089
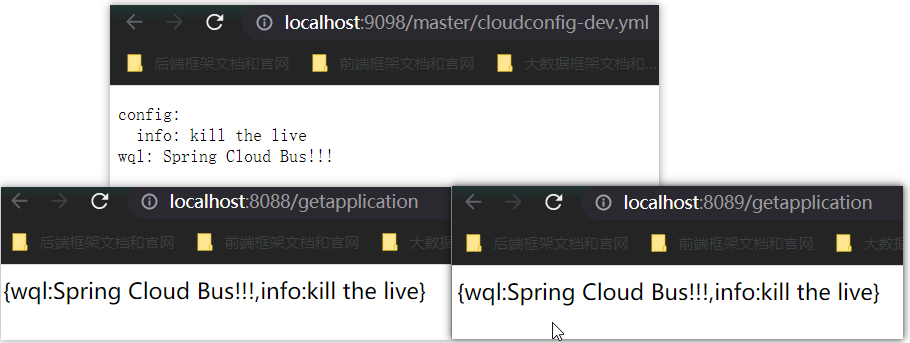
测试前:
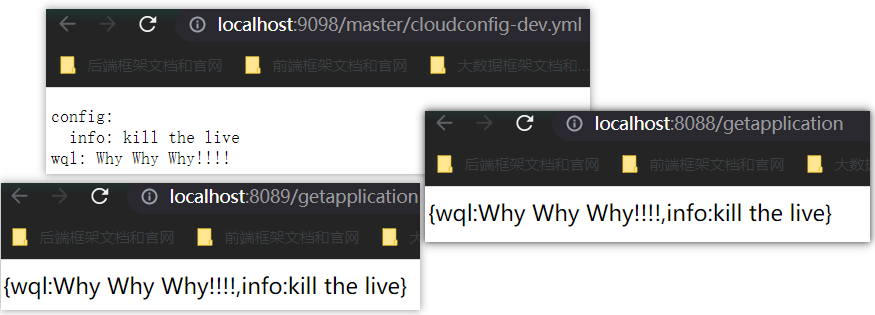
测试后:



Comments | NOTHING